
One of the greatest misconceptions of computers is that they are difficult to build on your own, but that is not so. Building your own computer is rewarding, cost-efficient, and a straightforward process. We have entire guides on how to choose the components and how to build your own PC.
If reading through guides isn’t your style, then there are thousands of YouTube videos that walk you through the steps of building your own computer. Plus, online technical forums are always available to help in building your own PC.
After building your own PC, (first, congratulations!) the hardware side of things is over with. Now, it’s a matter of setting up the software and getting your newly put creation to the test!
Below is a full guide on how to get your newly built PC past initial setup and ready to be used as a daily functioning device. The following is a high-level take on certain aspects, but secondary guides and videos can be easily found online if something sparks a question.
The System BIOS/UEFI
After you’ve finished building your computer, go ahead and plug in all of your additional peripherals, such as your mouse, keyboard, monitor, Ethernet cable, and speakers. Then, plug the PC into a wall outlet and flip the power supply switch to ON.
Go ahead and feel the gratification of pressing the case power button to get the PC started for the first time! If something doesn’t happen or if the PC turns on then off, refer to our How to Troubleshoot a PC guide on finding a bad connection or dead-on-arrival component.
While your computer is booting for the first time, you should see your motherboard’s splash screen. This splash screen is almost without exception the logo of the manufacturer of the motherboard. You may also notice white text indicating keyboard shortcuts to launch certain functions.
Often defaulted to the Delete key on the keyboard, rapidly pressing the DEL key on the connected keyboard while the PC is booting will launch you into the system BIOS or UEFI.
Common keyboard shortcuts for a BIOS include F8 for Windows Safe Mode, F12 for a one-time boot menu, DEL or F2 for BIOS entry, and a few other functions that may be listed on your screen during bootup. Always refer to the owner’s manual for all shortcuts.
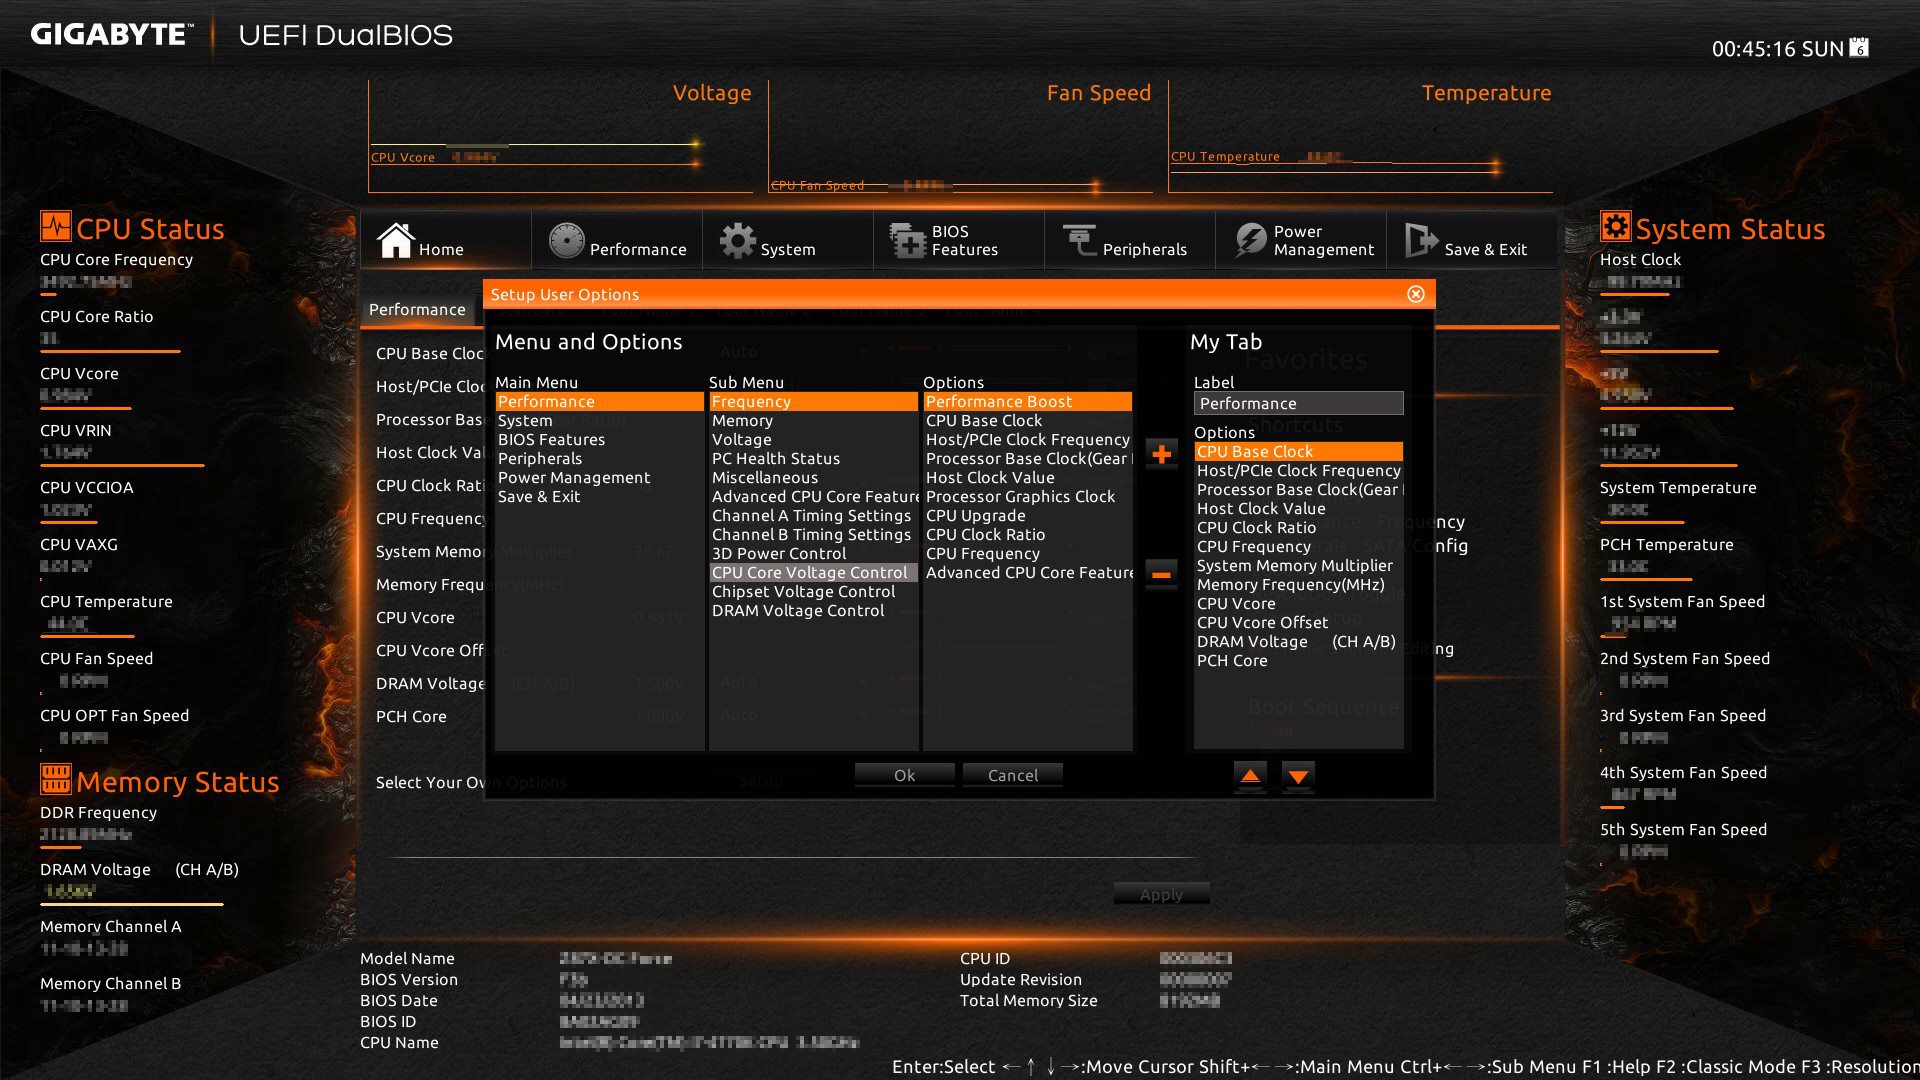
The BIOS is the Basic Input Output System of the computer. Essentially, the BIOS on a motherboard is the firmware that causes all of the components connected to the motherboard to talk to each other. Your BIOS monitors motherboard sensors, voltages, commands, and function hardware functions.
Inside the BIOS, parameters of the system can be adjusted. You can turn on temperature and fan warnings, modify power voltages to receive more horsepower out of your components, or check internal sensors to see exactly how the system is performing.
Most users will never need to enter the BIOS, however, become familiar with the layout of your BIOS. Each motherboard model and manufacturer has a slightly different BIOS from other models. This is a great place to help troubleshoot hardware-related problems of your PC.
Be warned on changing settings in the BIOS. A safe rule to follow is that if you aren’t sure what you are doing, don’t touch those settings. Damage can be done to the PC if a setting is incorrectly modified.
The only safe modification that can be done in a BIOS is the boot order. The boot order is how the motherboard chooses to boot to an operating system. You may have multiple hard or solid-state drives connected to your system. By having a boot order, the BIOS will cycle through a list of those connected drives to find the one with an installed operating system.
Operating System Installation
Microsoft’s Windows is the worlds most popular operating system and the one that is highly recommended for you to install on your newly built PC. With that said, your PC can run any operating system, including free ones such as Linux or Ubuntu.
As Windows 10 is the latest Windows operating system and the most desirable for 99% of users, we’ll want to focus on getting this one setup. It is not recommended to use older versions of Windows as you may not be able to find supported drivers and begin to fall out of support for Windows Updates.
To get started, you’ll need a cleared 8GB flash drive and a working computer. Then, using Microsoft’s Windows Media Creation Tool you can create a bootable Windows 10 flash drive.
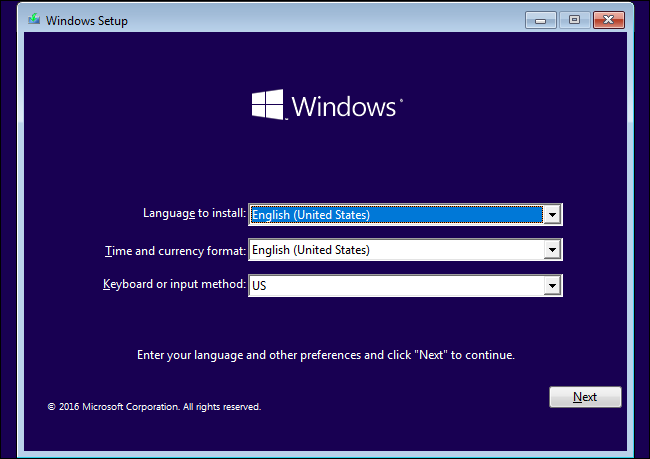
Once you have a Windows 10 bootable USB created, you’ll connect this to an open USB port to your newly built PC. Restart your newly built PC, and as the computer is booting this time, you’ll want to launch the One-Time Boot menu.
Computers have a One-Time Boot menu that allows you to override the settings for the previously mentioned BIOS boot order. While the PC is starting, those white texted labels mentioned earlier should inform you of which key to press, but normally it will be F8 or F12.
A new window should show up on your screen asking you which device the PC should boot to. Use your keyboard’s arrow keys to select the connected USB drive with the Windows 10 installation on it.
Installing Windows 10 is an easy process and in most cases as easy as pressing the Next button. If you’d like a step-by-step guide on how to install Windows 10, Microsoft Insider MVP Brink has an excellent guide on how to perform a Clean Install of Windows 10.
When the Windows 10 installation asks you for your product key, make sure you use a working computer to purchase a legal and legitimate copy of Windows 10 through the Microsoft store. Be warned of other websites that attempt to sell Windows at a heavy discount as these codes are often not for your region and may cause activation errors later down the line. Microsoft only sells through their store.
Most of us will be fine with Windows 10 Home. The Professional version of Windows 10 doesn’t offer features that would be a requirement for most users.
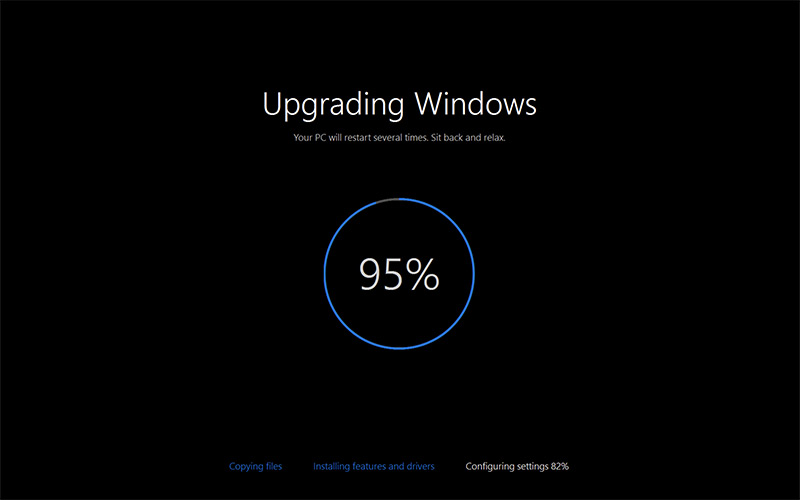
Once you’ve got Windows installed, you could instantly start using your computer for whatever you see fit, but there’s still a lot more to do, including updating your system.
The first step is to click on the Start icon in the bottom left, search for Windows Updates, and click the Check for updates button to prompt Windows to check for new updates for your system.
There may be multiple updates, and more may come after a reboot. Do this update check a few times, including after a reboot, until Windows reports that you’re up to date.
Driver Updates
Drivers for Windows are how your hardware components communicate with Windows. After the base installation of your operating system, Windows will use basic drivers to get you up and running. Windows Updates will follow that up with either newer or more exact drivers for your system.
If you aren’t using the latest drivers for your system or Windows never found an exact driver through Windows Updates causing you to be running your system on basic drivers, you may be heavily limiting your performance.
The first “driver” update that should be performed is the BIOS update. While not a driver, it does fall into this category. Using your favorite browser, navigate to the support page or driver download page of your motherboard.
Luckily, most of the drivers you’ll need will be from this download page. So, keep it handy or favorited.
Locate the latest BIOS update and go ahead and download it to run the executable file. Ensure that you aren’t already running the BIOS version you are installing and never install a beta BIOS.
While updating the BIOS, never kill the power until the installation is done. It should only take a moment, and the PC will automatically reboot once the update is complete.
Now, return to the support page of your motherboard. Install all of the latest drivers for your audio, chipset, visuals, and other available downloads for your operating system.
After those have been taken care of, make sure to grab the latest video card drivers from either Nvidia using their GeForce Experience or AMD.
Lastly, if you purchased an SSD for your system, ensure you are running the latest firmware. A simple Google search for the brand name followed by “ssd updater” should result in the tool from the manufacturer needed for your firmware update.
Samsung uses their Samsung Magician software, Crucial has their Firmware Tool, Corsair uses a toolbox, and so on. SSD firmware updates often add performance enhancements, but they are rare. Don’t be concerned if you haven’t received an SSD firmware update in a long time or if there isn’t one available.
Drivers will often fall out of support as your equipment becomes older. Eventually, the drivers you have will be the last ones supplied, but continue to check back for driver updates. As your machine becomes older, the need to check for newer drivers will become less and less.
Software
It’s time to get all of your software reinstalled to your new system, but perhaps not every piece of software.
When installing old applications, games, and content to your new computer, ask yourself how often you use that specific application. If you can’t remember the last time you’ve used that software, perhaps wait to reinstall it. You’ll take that clutter of folders and files from an unused application and never have to put it on your new shiny device.
With that said, be warned of additional bloatware when reinstalling your applications. A lot of free applications come bundled with toolbars, optional software, or potentially unwanted programs that may be harmful to your system.
To avoid accidentally installing bloatware to your system, tools such as Unchecky are available which will automatically block those pesky hidden bundles.
When it comes to security of your PC, make sure you have an antivirus configured and working before installing applications. For almost all users, I recommend using the free Windows 10 Defender antivirus as it offers premium and protective support all at the low cost of free. For those that have a paid solution, install and configure the paid antivirus before installing additional applications.
While Defender is a great single application, it can be paired with an Anti-Malware tool such as Malwarebytes. Malwarebytes will protect your system against newer malware before Defender even knows about it. These two make a great partnership.
Start with installing utility software such as Microsoft Office or a favorite browser before installing less important downloads.
Maintenance
Make sure that you keep your new computer running at the best performance possible. To do this, there are a lot of maintenance steps to follow along to.
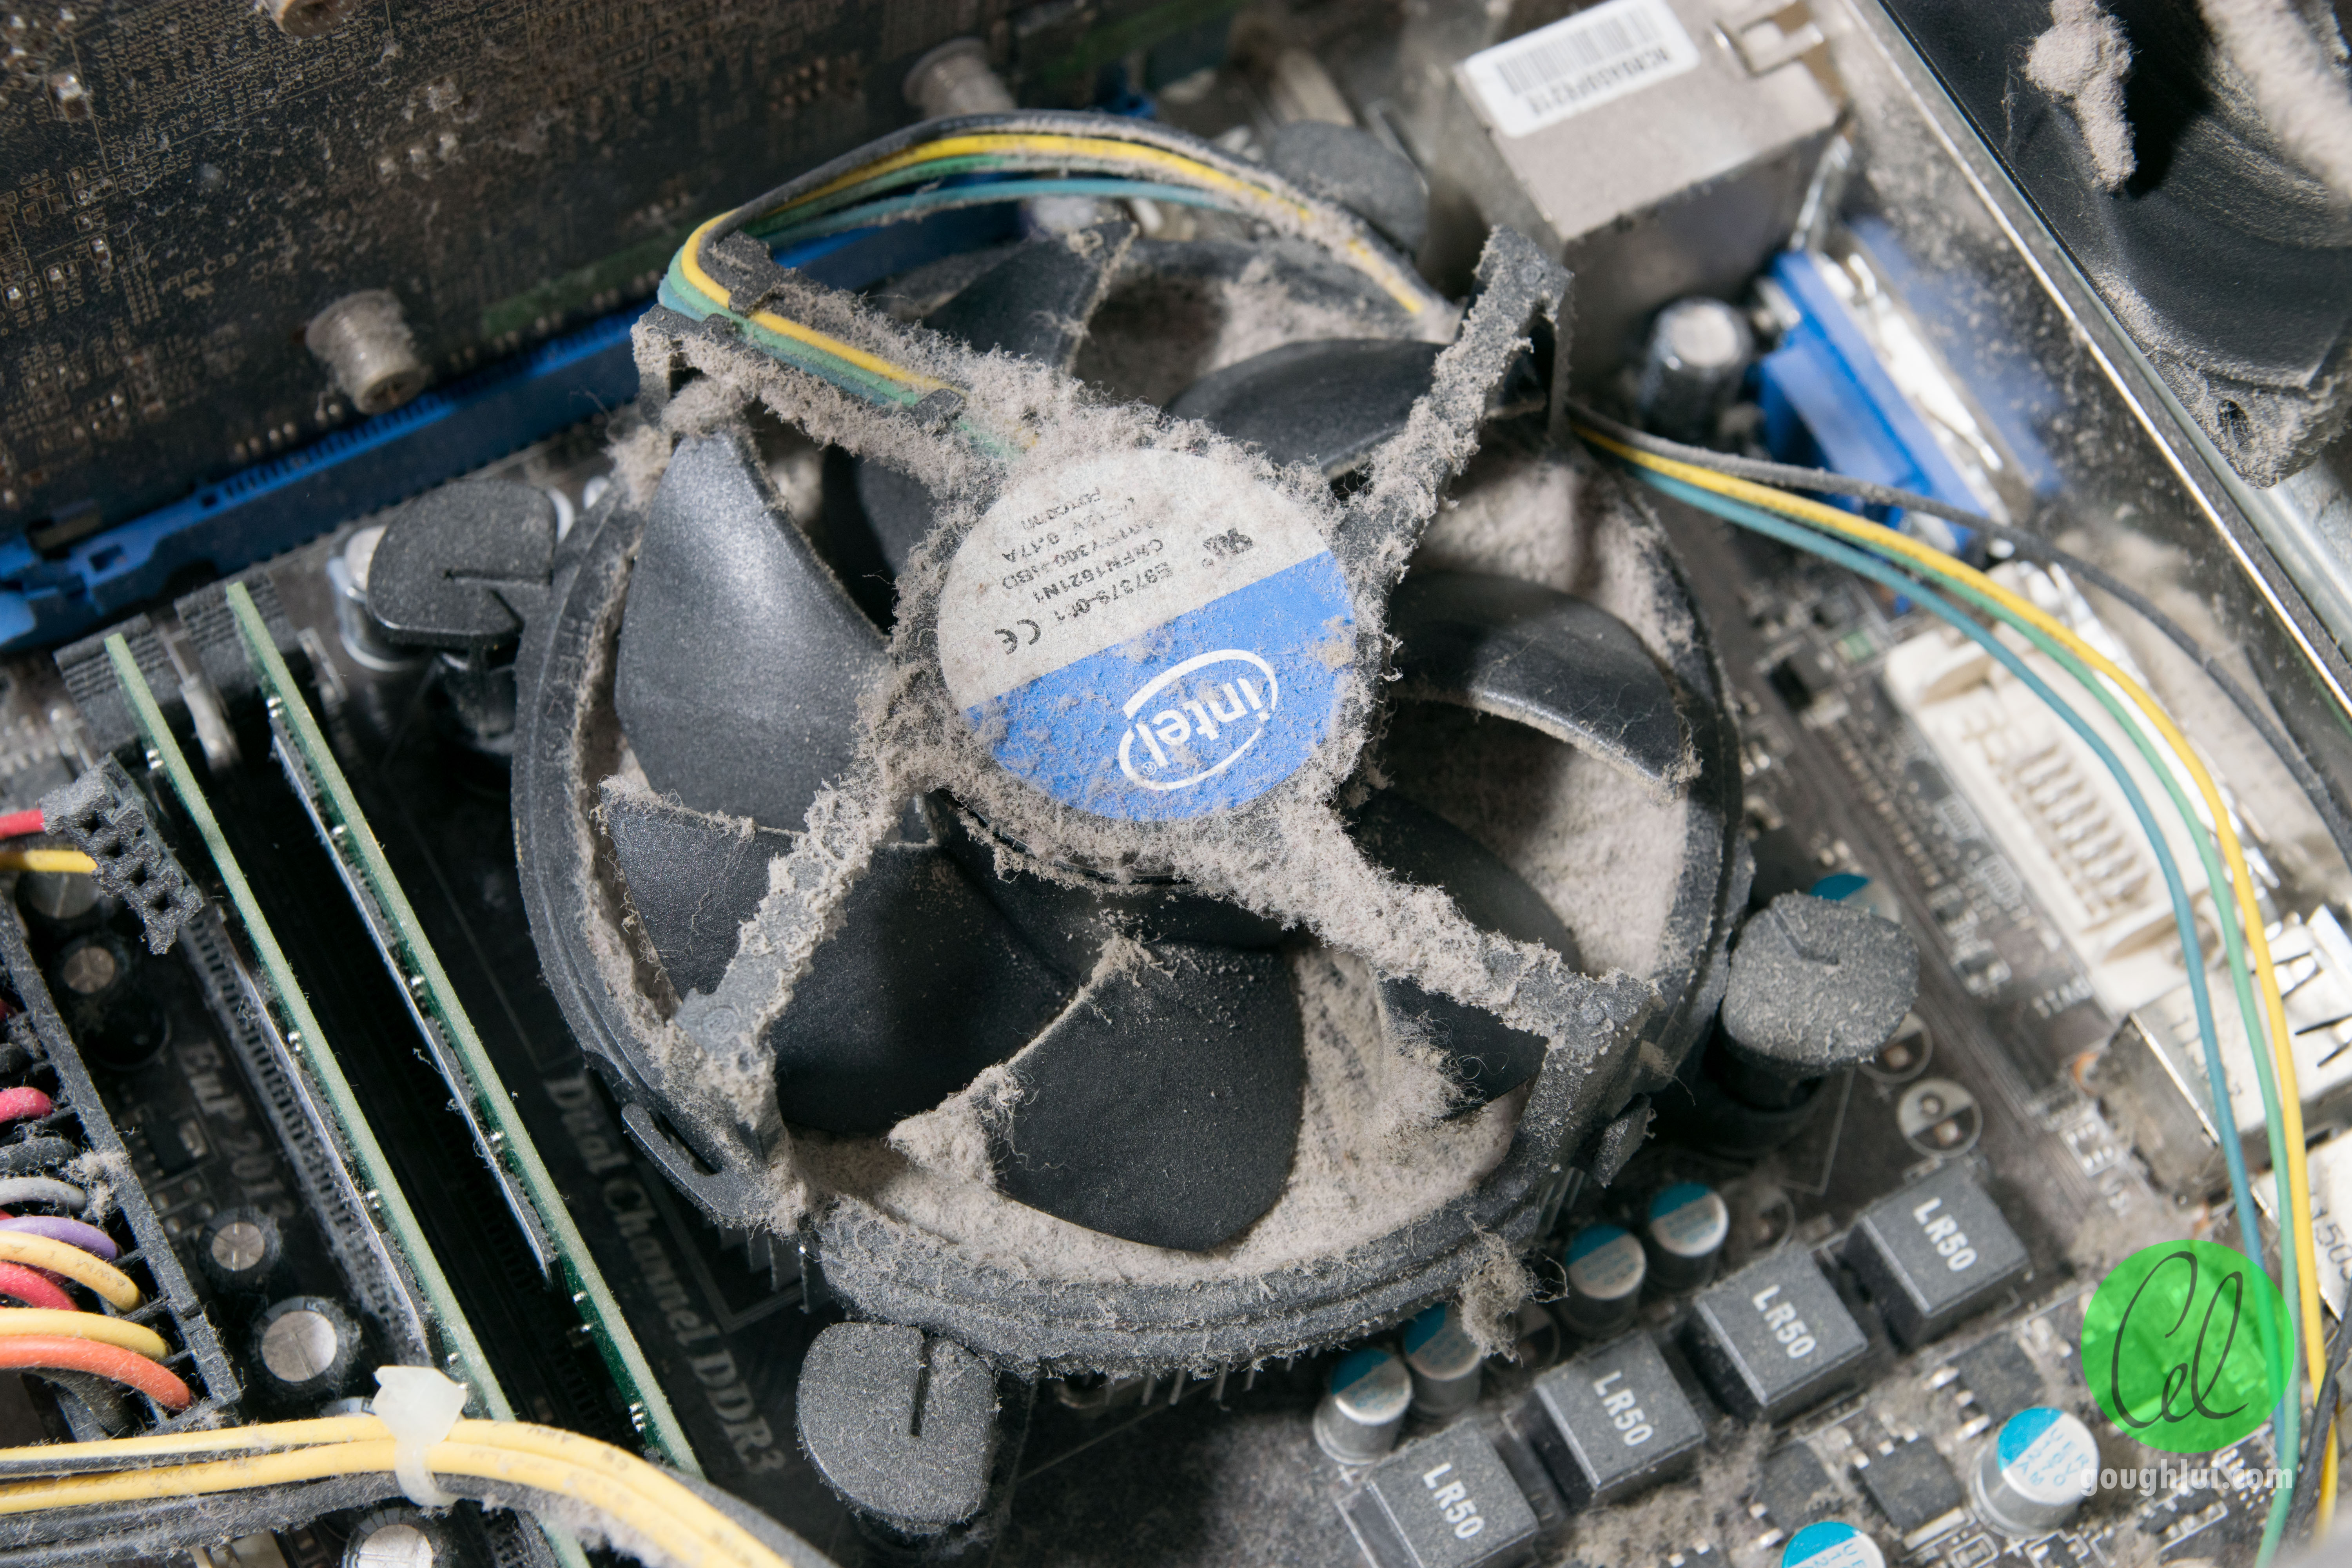
First, always keep your PC clean and free of dust. As the computer gets older, dust is bound to get inside and begin cluttering up the fans and other components. In return, your PC runs hotter and lowers the performance output to help keep itself from overheating.
Using compressed air is the best way to clean out your computer. I recommend doing this twice a year and be sure to not over-spin fans or use a lot of forced air directly on one component. You’ll want an even spray of air throughout the case.
Speaking of keeping things clean, keep your hard drive clean by using the built-in Windows Disk Cleanup tool. This helps keep Windows running smoother by deleting unnecessary Windows temporary files that otherwise take up space on your system.
Third party tools exist that will do the same function such as the well-known CCleaner app. However, be warned that CCleaner may delete additional content and files that you may not want to remove. It is also a tool that will constantly be running in the background.
Maintenance tools such as Driver Updaters or Registry cleaners are not recommended for use.
Software that states it can update your drivers is often considered malicious or has a secondary objective to what it appears to be doing. However, tools from Intel, AMD, Nvidia, Samsung, and the such do offer legitimate driver updater tools.
Registry cleaners on the other hand can create potential harm to your PC by deleting valid and used registry keys. Seeing that deleting keys from the registry saves only kilobytes from a hard drive, it’s best to leave the Registry alone.
Lastly, after your computer is configured and ready to go, always make sure you have a backup of your PC. Things can happen to your PC that cause it to stop working unexpectedly. Use a secondary device such as a NAS to back up the content on your computer.
Third party tools such as Acronis True Image or Macrium Reflect are great options to do automatic backups of your computer and to ensure all of your data is securely stored on a NAS. This is your last line of defense against harm to your electronic files. Out of all of the recommendations in this guide, this one is the most important.
Conclusion
Have fun with your new computer. Use it to the full extent of what it can do and never limit yourself. A computer nowadays will last you for years to come with the right maintenance and upkeep and seeing that computers are now a daily necessity, it is important to treat your computer like we do our smartphones.
Remember to always be safe on the internet and never download something from a questionable website. Be warned on the information you give out on the web as well.
When things break, or something bad happens, always reach out to free tech support boards through the Microsoft Community, Reddit, TenForums, TechSupportForum, or the many other available free IT supporting websites of the World Wide Web. Thousands of IT specialists on the web are willing to help you for free!
© 2018 Justin Vendette